January update: Visuals, usability and early testing
For a while, my focus for my Vive VR game Eye of the Temple have been to not expand more on gameplay right now but rather on improving what I've got in order to make it as presentable as possible.
That has meant:
- Improving visuals.
- Addressing usability issues found in play-testing.
(If anybody wonder what happened to the Whip Arena spin-off game, I put that on hold after it become clear it only worked well with a quite large physical VR space, which very few people have available.)
3D models
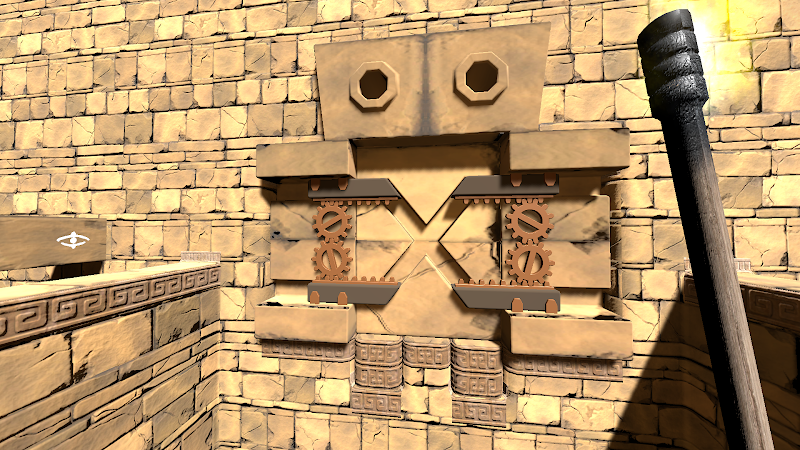
Gate model. Two keys must be inserted above the gate to unlock and open it:
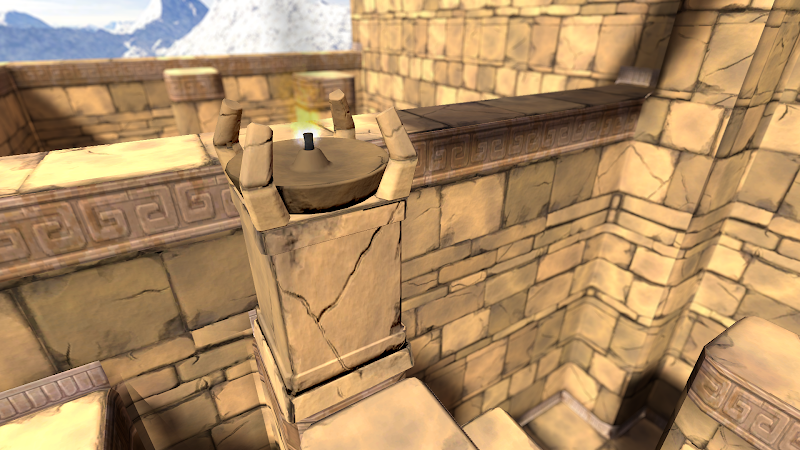
Stone torch model. You light these with your torch to trigger things happening:
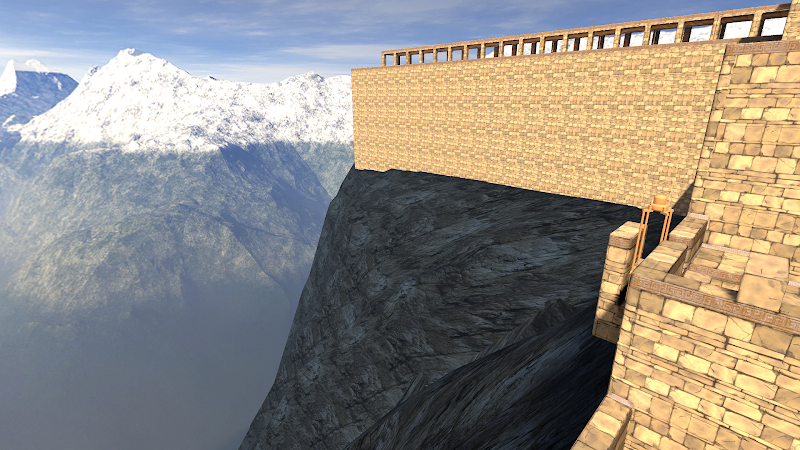
Cliffs model. The temple used to just float in the air; now it's grounded:
For a long time the game was full of placeholder models made of simple boxes and cylinders. There's still some of those left, but I've been working on replacing them all with proper models.
After briefly planning to work with contractors for 3D models, I decided to learn 3D modeling myself instead (and deal with the various challenges that come with it).
The models I need have highly specific requirements (they need to have very exact measurements and functionality to fit into the systems of the game) yet in the end they are quite simple models (man-made objects with no rigging).
With this combination it turned out that back-and-forth communication even with a very skilled artist took as much time as just doing the work myself. I'll still be working with artists for the game, just not for the simple 3d models I need.
Several of the models still have placeholder texturing. I have an idea for a good texture creation workflow for them, but it will take a little while to establish, so I'm postponing that while there's more pressing issues.
Intro section
My goal is that Eye of the Temple should be a rather accessible game. You need a body able to walk and crouch, and not be too afraid of heights, but I want it simple enough to play that people who don't normally play computer games can get into it without problems.
This has largely been a success. Gamers or not, I normally just let people play without instructions, and they figure things out. My dad completed the whole thing in one hour-long session when he was visiting.
The game did throw people in at the deep end though, asking them right from the start to step between moving platforms four meters above the ground. Some people would hesitate enough to end up mis-timing their step and stumble, making the experience even more extreme right from the beginning.
To ease people a bit more in, I've worked on an intro section that starts out with only a 0.75 meter drop, and the first two platforms have no timing requirement. I have yet to get wide testing of this to see if it helps.
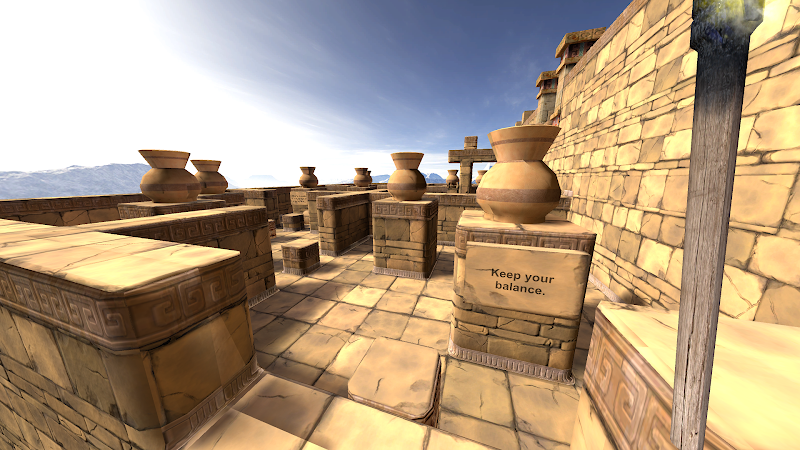
There is one particular problem I've toiled with for a while, which is to design a platform that bridges two spots in a compact manner. Why this is tricky relates to how the game lets you explore a large virtual space using just a small physical space.
Originally I had platforms rotating around a center axis, but that made some people motion sick who otherwise didn't have problems with the rest of the game.
I tried various contraptions to replace it, but they were complicated and awkward to use. My latest idea is using just a barrel-like rolling block, which is nice in its simplicity, and also a fun little gimmick to balance on once you understand how to use it.
Figuring out what you're meant to do is easy to miss though, as I found out with the first tester trying it. I have some ideas for a subtle way to teach it, but that will take quite some time to implement. For now I settled for slapping a sign up that explains it.
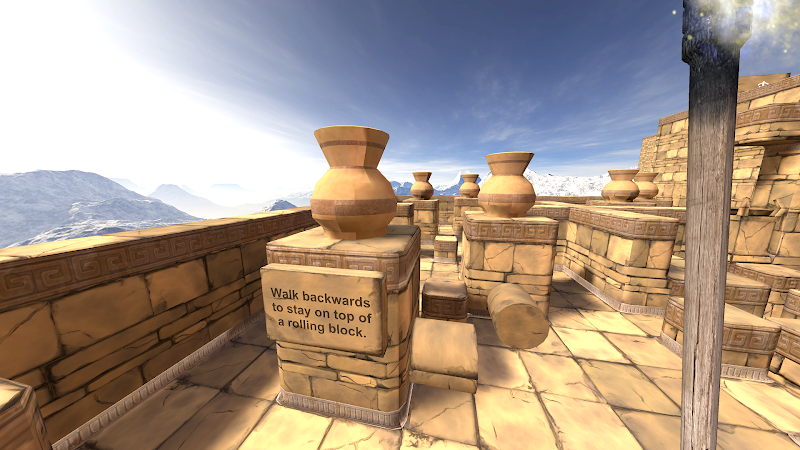
Early testers online forum
There is no substitute for directly observing people playing a game, but this is impractical for me to do frequently when I also have a full-time job. I'm lucky if I get to do it two times a month.
In order to try to get faster feedback and shorter iteration cycles, I've now opened up for people to sign up online to be early testers of the game. If you have access to a Vive and would like to try out the game and provide detailed feedback based on your experience, please don't hesitate to join!
Sign up to provide feedback on early builds of Eye of the Temple
The quest for automatic smooth edges for 3d models
I'm currently learning simple 3D modeling so I can make some models for my game. I'm using Blender for modeling.
The models I need to make are fairly simple shapes depicting man-made objects made of stone and metal (though until I get it textured it will look more like plastic). There are a lot of flat surfaces.
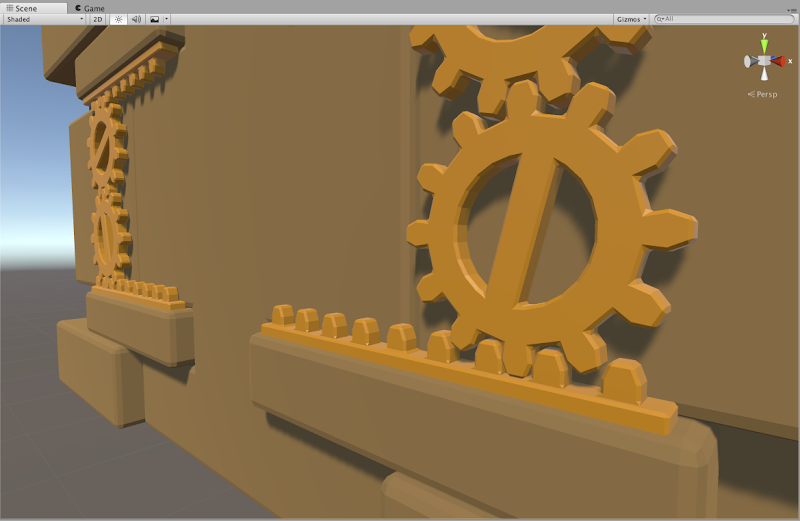
The end result I want is these simple shapes with flat surfaces - and smooth edges. In the real world, almost no objects have completely sharp edges, and so 3d models without smooth edges tend to look like they're made of paper, like this:
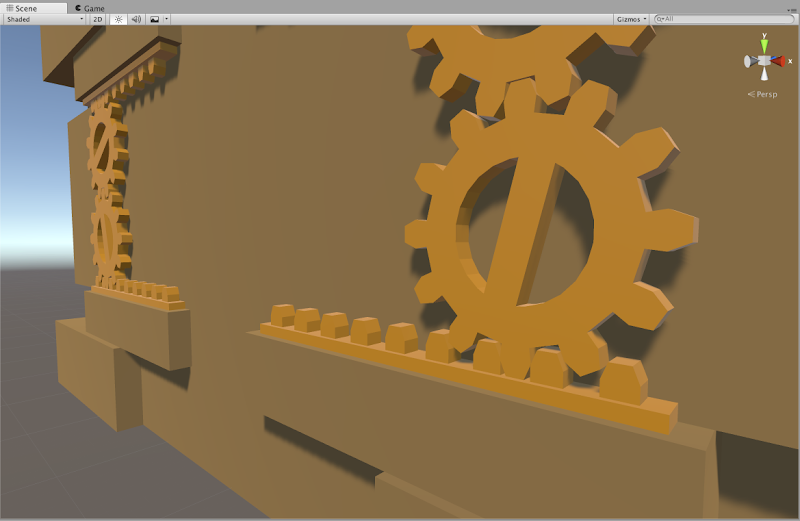
What I want instead is the same shapes but with smooth edges like this:
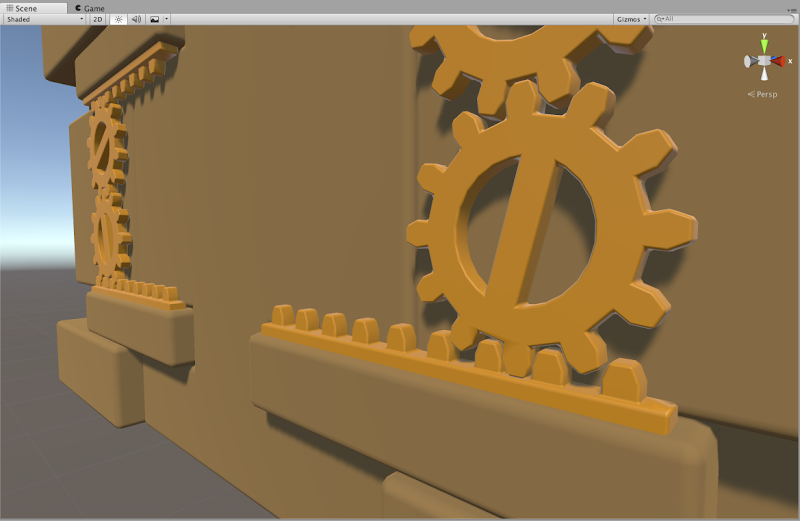
Here, some edges are very rounded, while others have just a little bit of smoothness in order to not look like paper. No edges here are actually completely sharp.
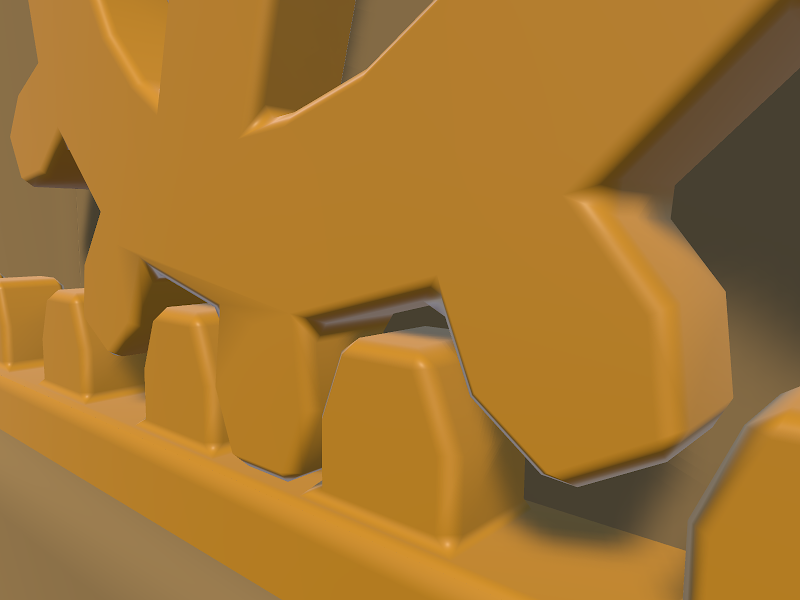
The two images above shows the end result I wanted. It turns out it was much harder to get there than I had expected! Here's the journey of how I got there.
How are smooth edges normally obtained? By a variety of methods. The Blender documentation page on the subject is a bit confusing, talking about many different things without clear separation and with inconsistent use of images.
Edge loops plus subdivision surface modifier
From my research I have gathered that a typical approach is to add edge loops near edges that should be smooth, and then use a Subdivision Surface modifier on the object. This is also mentioned on the documentation page above. This has several problems.
First of all, subdivision creates a lot of polygons which is not great for game use.
Second, adding edge loops is a manual process, and I'm looking for a fully automatic solution. It's important for me to have quick iteration times. To be able to fundamentally change the shape and then shortly after see the updated end result inside the game. For this reason I strongly prefer a non-destructive editing workflow. This means the that the parts that make up the model are kept as separate pieces and not "baked" into one model such that they can no longer be separated or manipulated individually.
Adding edge loops means adding a lot of complexity to the model just for the sake of getting smooth edges, which then makes the shape more cumbersome to make major changes to afterwards. Additionally, edge loops can't be added around edges resulting from procedures such as boolean subtraction (carving one object out of another) and similar, at least not without baking/applying the procedure, which is a destructive editing operation.
Edge loops and subdivision is not the way to go then.
Bevel modifier
Some posts on the web suggests using a Bevel modifier on the object. This modifier can automatically add bevels of a specified thickness for all edges (or selectively if desired). The Bevel modifier in Blender does what I want in the sense that it's fully automatic and creates sensible geometry without superfluous polygons.
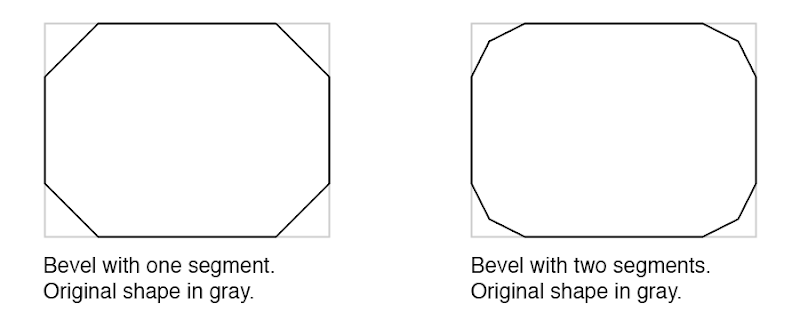
However, by itself the bevel either requires a lot of segments, which is not efficient for use in games (I'd want one to two segments only to keep the poly count low) or when fewer segments are used it creates a segmented look rather than smooth edges, as it can also be seen below.
Baking high-poly details into normal maps of low-poly object
Another common approach, especially for games, is to create both a high-poly and a low-poly version of the object. The high-poly one can have all the detail you want, so for example a bevel effect with tons of segments. The low-poly one is kept simple but has the appearance from the high-poly one baked into its normal maps.
This is of course a proven approach for game use, but it seems overly complicated to me for the simple things I want to achieve. Though I haven't tried it out in practice, I suspect it doesn't play well with a non-destructive workflow, and that it adds a lot of overhead and thus reduces iteration time.
Bevel and smooth shading
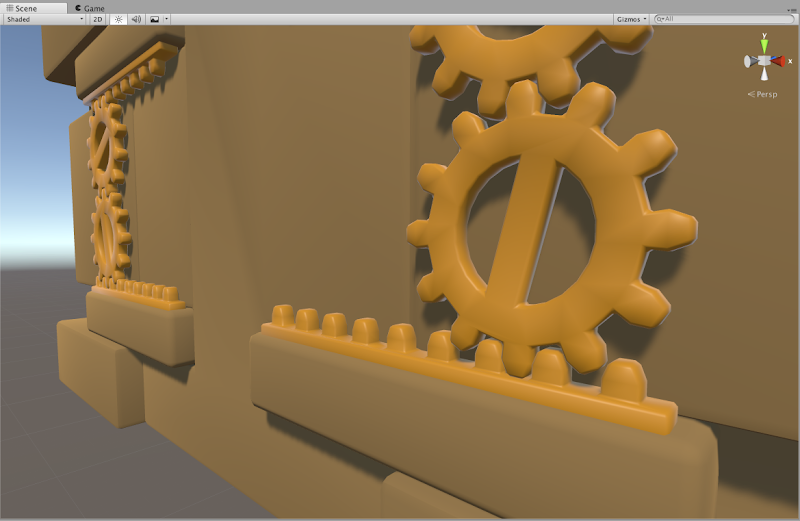
Going back to the bevel approach, what I really want is the geometry created by the Bevel modifier but with smooth shading. The problem is that smooth shading also makes the original flat surfaces appear curved.
Here is my model with bevel and smooth shading. The edges are smooth sure enough, but all the surfaces that were supposed to be flat are curvy too.
Smooth shading works by pretending the surface at each point is facing in a different direction than it actually does. For a given polygon, the faked direction is defined at each of its corners in the form of a normal. A normal is a vector that points out perpendicular to the surface. Only, we can modify normals to point in other directions for our faking purposes.
The way that smooth shading typically calculates normals makes all the surfaces appear curved. (There is typically a way to selectively make some surfaces flat, but then they will have sharp edges too.) The diagram below shows the normals for flat shading, for typical smooth shading, and for a third way that is what I would need for my smooth edges.
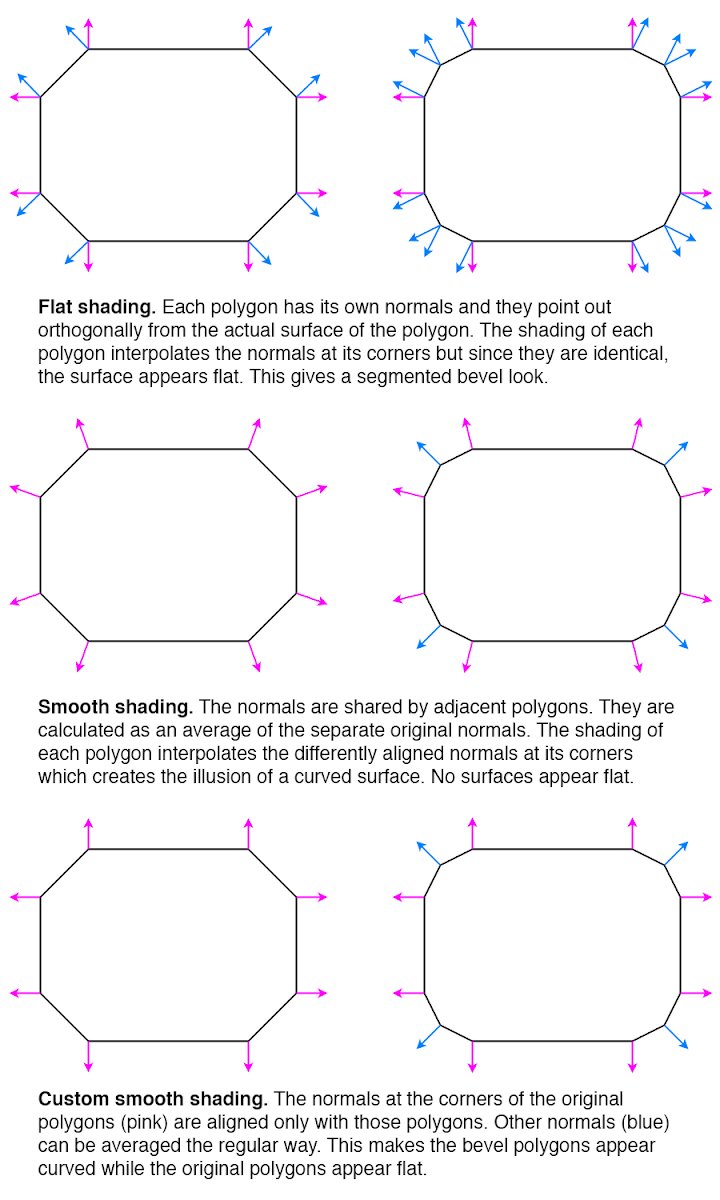
So how can the third way be achieved? I found a post that asks the same question essentially. The answers there don't really help. One incorrectly concludes that Blender's Auto Smooth feature gives the desired result - it actually doesn't but the lighting in the posted image is too poor to make it obvious. The other is the usual edge loop suggestion.
When I posted question myself requesting clarification on the issue, I was pointed to a Blender add-on called Blend4Web. It has a Normal Editing feature with a Face button that seems to be able to align the normals in the desired way - however as a manual workflow, not an automated process. I also found other forum threads discussing the technique.
Using a better smoothing technique
At this point I got the impression there was no way to get the smooth edges I wanted in an automated way inside of Blender, at least without changing the source code or writing my own add-on. Instead I considered an alternative strategy: Since I ultimately use the models in Unity, maybe I could fix the issue there instead.
In Unity I have no way of knowing which polygons are part of bevels and which ones are part of the original surfaces. But it's possible to take advantage of the fact that bevel polygons are usually much smaller.
There is a common technique called face weighted normals / area weighted normals (explained here) for calculating averaged smooth normals which is to weigh the contributing normals according to the surface areas of the faces (polygons) they belong to. This means that the curvature will be distributed mostly on small polygons, while larger polygons will be more flat (but still slightly curved).
From the discussions I've seen, there is general consensus that this usually produces better results than a simple average (here's one random thread about it). It sounds like Maya uses this technique by default since at least 2014, but smooth shading in Blender doesn't use it or support it (even though people have discussed it and made custom add-ons for it back in 2008), nor does the model importer in Unity (when it's set to recalculate normals).
Custom smoothing in Unity AssetPostprocessor
In Unity it's possible to write AssetPostprocessors that can modify imported objects as part of the import process. This can also be used for modifying an imported mesh. I figured I could use this to calculate the smooth normals in an alternative way that produces the results I want.
I started by implementing just area weighted normals. This technique still make the large faces slightly curved. Here is the result.
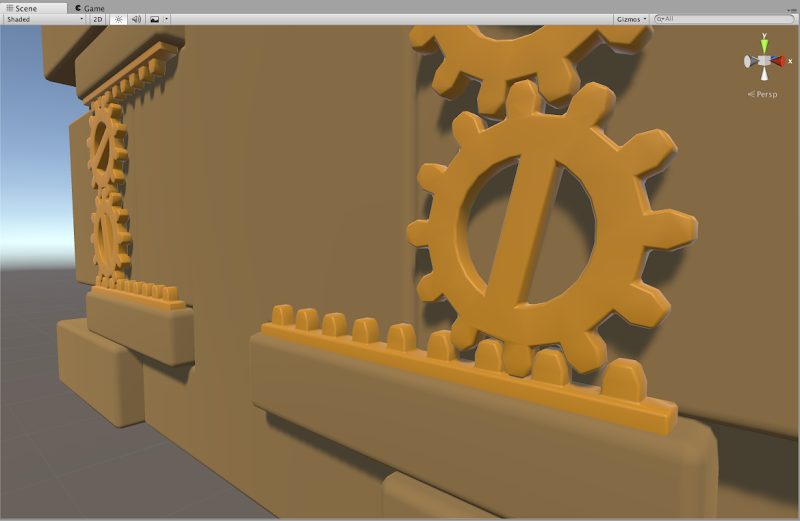
Honestly, the slight curvature on the large faces can be hard to spot here. Still, I figured I could improve upon it.
I also implemented a feature to let weights smaller than a certain threshold be ignored. For each averaged normal, all the contributing normals are collected in a set, and the largest weight is noted. Any weight smaller than a certain percentage of the largest weight can then be ignored and not included in the average. For my geometry, this worked very well and removed the remaining curvature from the large faces. Here is the final result again.

The code is available here as a GitHub Gist. Part of the code is derived from code by Charis Marangos, aka Zoodinger.
Future perspectives
The technique of aligning smooth normals on beveled models with the original (pre-bevel) faces seems to be well understood when you dig a bit, but poorly supported in software. I hope Blender and other 3D software one day will have a "smooth" option for their Bevel modifier which retains the outer-most normal undisturbed.
A simpler prospect is adding support for area weighted normals. This produces almost as good result for smooth edges, and is a much more widely applicable technique, not specific to bevels or smooth edges at all. That Blender, Unity and other 3D software that support calculating smooth normals do not include this as an option is even more mind-boggling, particularly given how trivial is it to implement. Luckily there workarounds for it in the form of AssetPostprocessors for Unity and custom add-ons for Blender.
If you do 3D modeling, how do you normally handle smooth edges? Are you happy with the workflows? Do some 3D software have great (automatic!) support for it out of the box?